Quickstart for a Static Site
In this quickstart guide, you'll learn the process of publishing a static site. We will cover installation of the CLI, setting up a new static site, and deploying it.
Prerequisites
The project requires the following tools to be installed on your system:
Deploying a Static Site
Install Wasmer CLI
Install the latest version of Wasmer CLI following the instructions here.
You can see all commands available with wasmer --help. You can also
read the CLI documentation online.
Please check that you have the latest version of wasmer runtime as this tutorial depends on version 4.2.3 or higher.
Log in into Wasmer
Create a new account in Wasmer (opens in a new tab). Then, log in into the Wasmer CLI and follow the provided steps to provide the CLI access to your Wasmer account.
wasmer loginInitialize a Static Site
If you want to deploy a static site made from frameworks like React, Vue, or Svelte, you can follow our React Static Site tutorial.
With the CLI installed, let's create a new static site!
Run the commands below to create a new directory and initialize:
$ mkdir my-new-site
$ cd my-new-site
$ wasmer app create --type static-website
Who should own this package?:
> <your-username>
What package do you want to use?:
> Create new package # 👈🏼 let's select this for this tutorial
  Use existing package
What should the package be called?: my-new-site
What should be the name of the app?: <your-username>-my-new-site
Would you like to publish the app now? yes
Creating the app...
Publishing package...
[1/2] ⬆️   Uploading...
[2/2] 📦  Publishing...
Successfully published package `<your-username>/my-new-site@0.1.0`
Deploying app <your-username>/<your-username>-my-new-site...

 ✅ App <your-username>/<your-username>-my-new-site was successfully deployed!

> App URL: https://<your-username>-my-new-site.wasmer.app
> Versioned URL: https://x43izt2fk0n5.id.wasmer.app # 🌐 You can access our URL too
> Admin dashboard: https://wasmer.io/apps/<your-username>/<your-username>-my-new-site

Waiting for the app to become reachable...
(You can safely exit now with CTRL-C)
The wasmer app create --type static-site command will prompt you for the following:
- Package owner: This is the owner of the package. It can be your username or an organization.
- Package: This is the package you want to use. You can either select an existing package or create a new one.
- Package name: This is the name of your package. It must be unique across all packages on your namespace.
- App name: This is the name of your app. It must be unique across all apps on your namespace.
- Publish: This will publish the new package and app to the registry.
As you see above in the last line of the output, the CLI will prompt you to publish the new package and app. We recommend publishing the package and app.
The above command will do the following:
- Create a Wasmer package config (
wasmer.toml) - Create a app config (
app.yaml) - Create a public directory that holds the website data
Don't change the public directory attribute in the wasmer.toml file for
this tutorial. If you want to learn how to specify a different directory for
build output, check out our React Static
Site tutorial.
Your directory structure should look like this:
Add Your Site Content
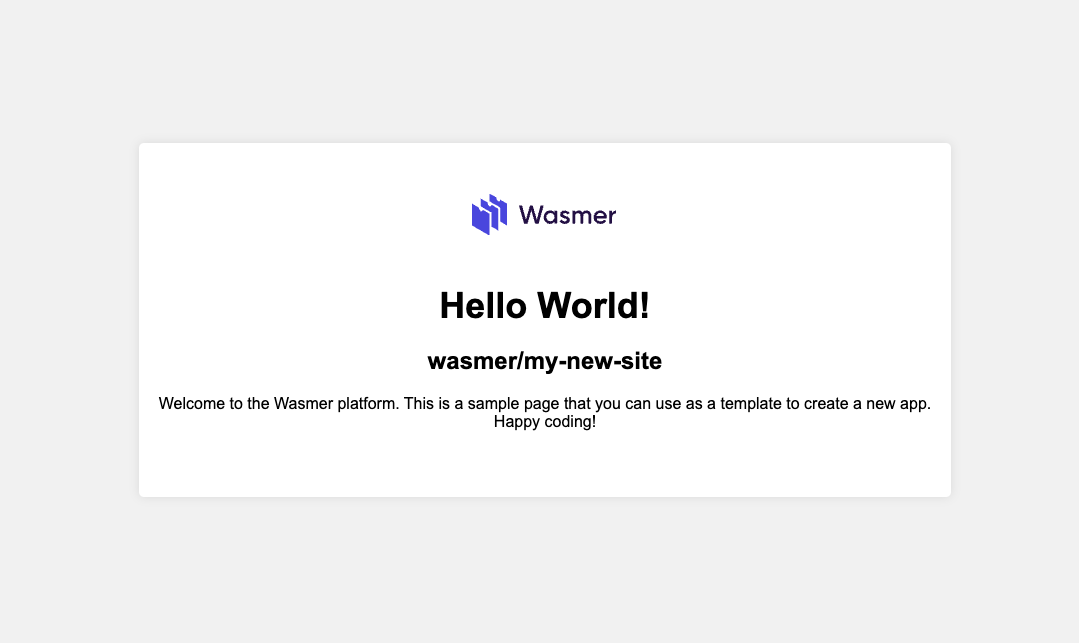
Currently, the public directory only contains a basic index.html file.
The index file should look like this by default in a browser:
You can now modify this directory and copy your own files (HTML, CSS, JavaScript, images, etc) as needed.
For this quickstart, we will use the default
index.htmlfile.
Test Your Site Locally
You can also test your site locally before publishing by running the following command:
wasmer run . --net -- --port 9000This will start a local server using the Static Web Server on http://localhost:9000.
You can also specify a different port by changing the --port flag.
The arguments after
--are passed to the static web server.
You can see all the available options with wasmer run --help or click
here to see the full documentation. To see all the avilable
options for the static web server, run wasmer run . -- --help.
Deploy Your Site
Once you have added all the necessary files to the public directory, it's time to update site.
Run the following command to deploy your site:
wasmer deployLoaded app from: /path/to/your/directory/app.yaml
Publish new version of package '<your-username>/my-new-site'? yes
Publishing package...
[1/2] ⬆️ Uploading...
[2/2] 📦 Publishing...
Successfully published package `<your-username>/my-new-site@0.1.1` # Notice the version number
Waiting for package to become available.....
Package '<your-username>/my-new-site@0.1.1' published successfully!
Deploying app <your-username>-my-new-site...
✅ App <your-username>-my-new-site was successfully deployed!
> App URL: https://<your-username>-my-new-site.wasmer.app
> Versioned URL: https://v1piztzfz41v.id.wasmer.app # 🌐 You can access our URL too
> Admin dashboard: https://wasmer.io/apps/<your-username>/<your-username>-my-new-site
Waiting for the app to become reachable...
(You can safely exit now with CTRL-C)
.
App is now reachable!You must be in the directory holding the wasmer.toml and app.yaml config
files.
wasmer deploy automatically publishes your package and bumps the minor
version. You can check all the available options with wasmer deploy --help
or click here to see the full documentation.
Executing this command will package and deploy your site.
Now you can access your site on the web at the URL provided in the output.
Conclusion
Congratulations! You have successfully deployed a static site on Wasmer Edge 🚀.
Tip: To make changes to your site, simply modify the files in the public directory and run
wasmer deployagain to deploy the changes.