Domains and DNS
You can attach your own domain to a WordPress app from the dashboard and then point the required DNS records at Wasmer.
Add the domain in Wasmer
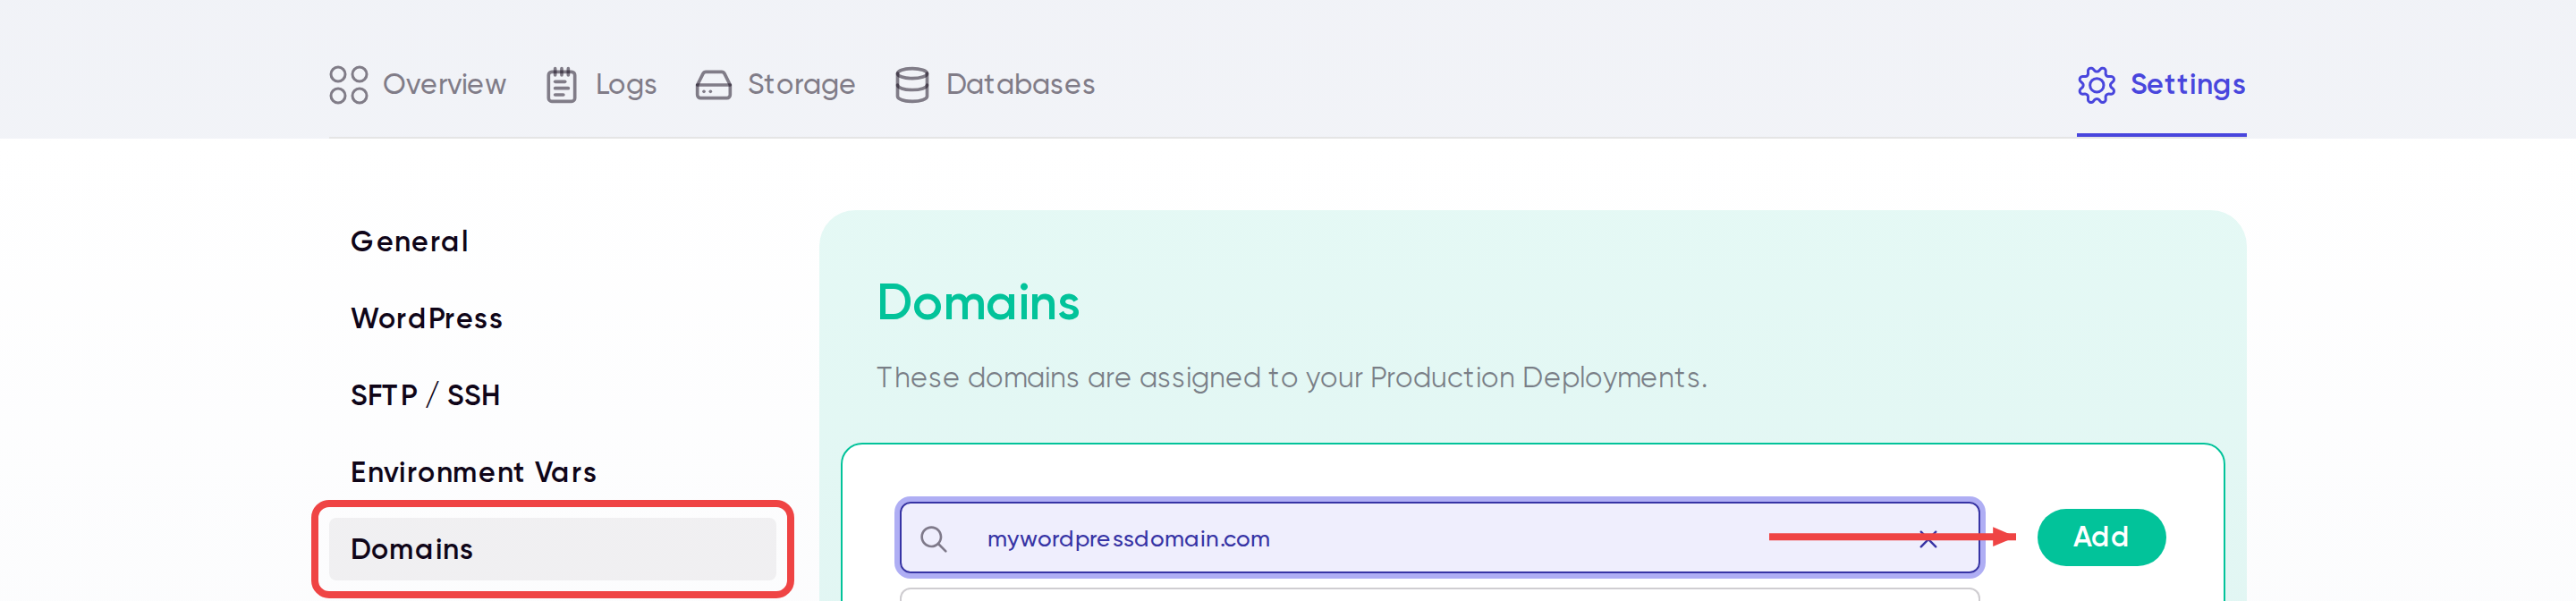
- Open your app in the Wasmer dashboard.
- Click Settings.
- Select Domains in the sidebar.
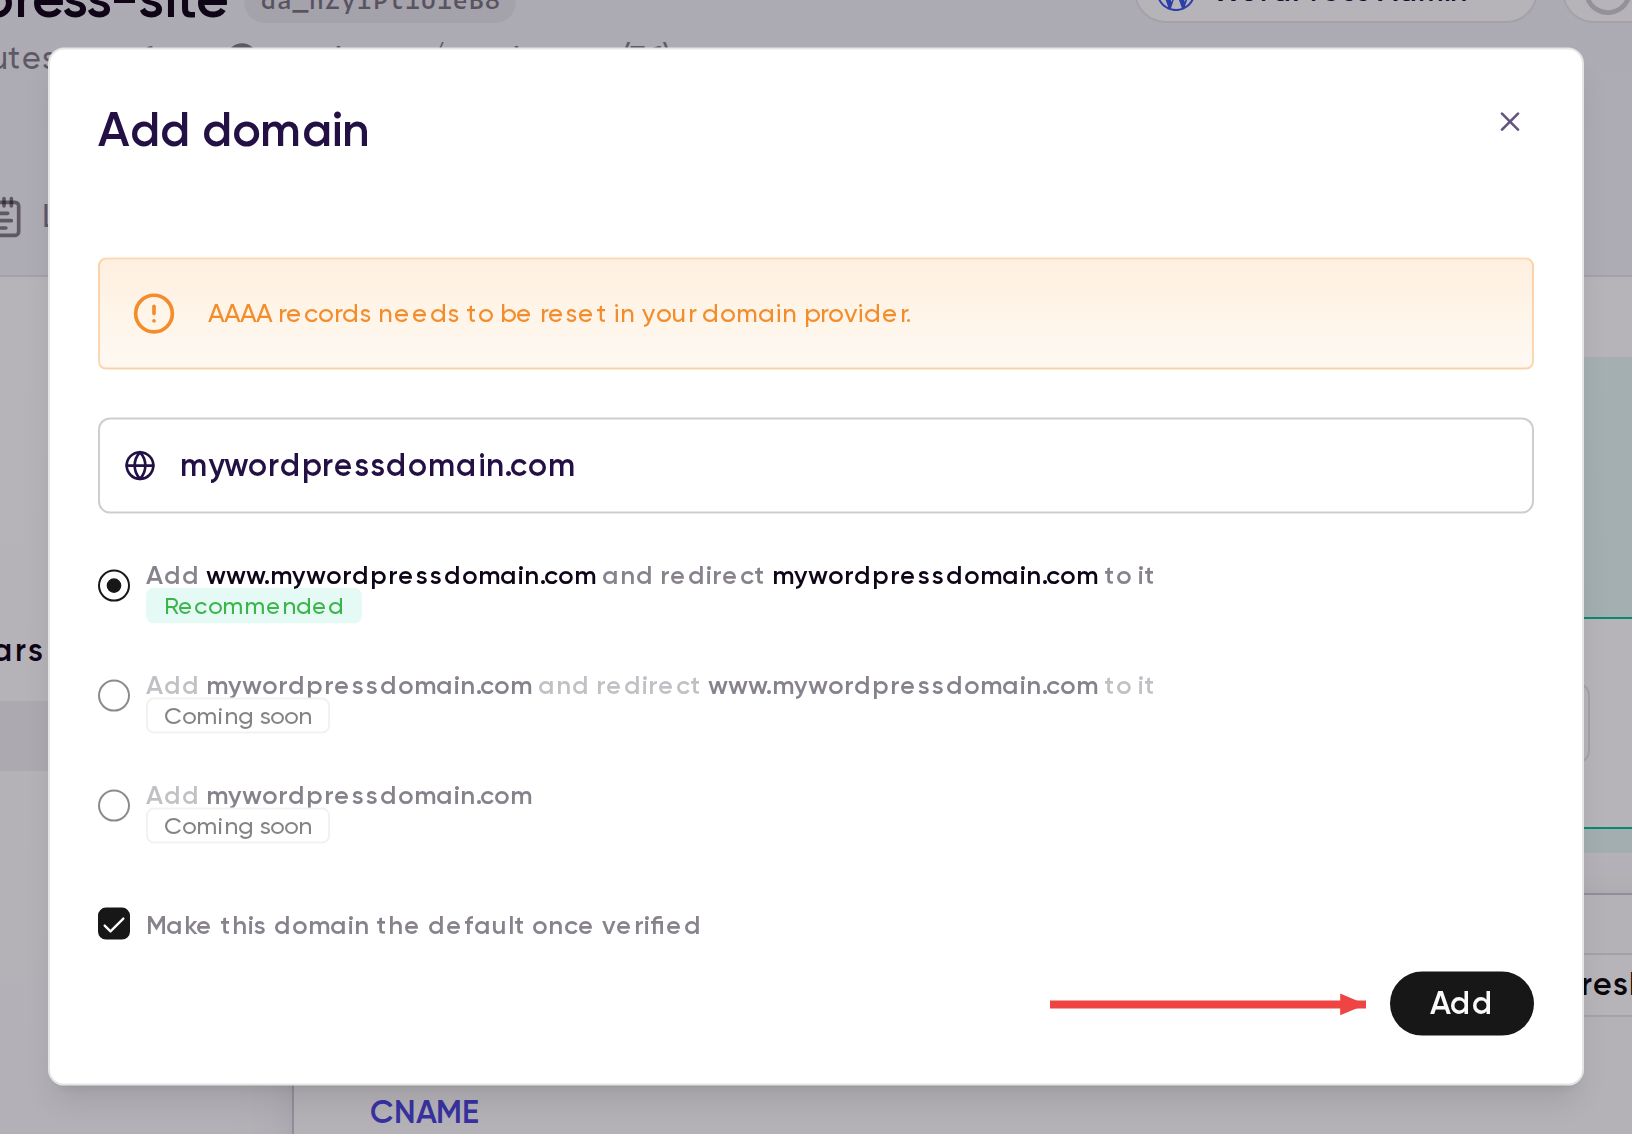
- Enter the domain you want to use. A dialog opens with two routing options.
- Choose a routing option: add
www.yourdomain.comand redirect the root domain to it (recommended), or add the domain exactly as entered. - Check Make this domain the default once verified if you want it to be your primary hostname.
- Click Add.
Apex domains cannot be added without redirection: if you enter a root domain such as yourdomain.com, you must redirect it to a subdomain like www.yourdomain.com. Support for apex domains without redirection is coming soon.
If your domain has existing AAAA records at your DNS provider, remove them. Stale AAAA records break domain verification and traffic routing.
Point DNS records
After the domain is added, follow the DNS records shown in the modal.
- Copy the exact values shown by Wasmer.
- Create the required records at your DNS provider.
- Wait for DNS propagation.
- Return to the Wasmer dashboard and click Refresh.
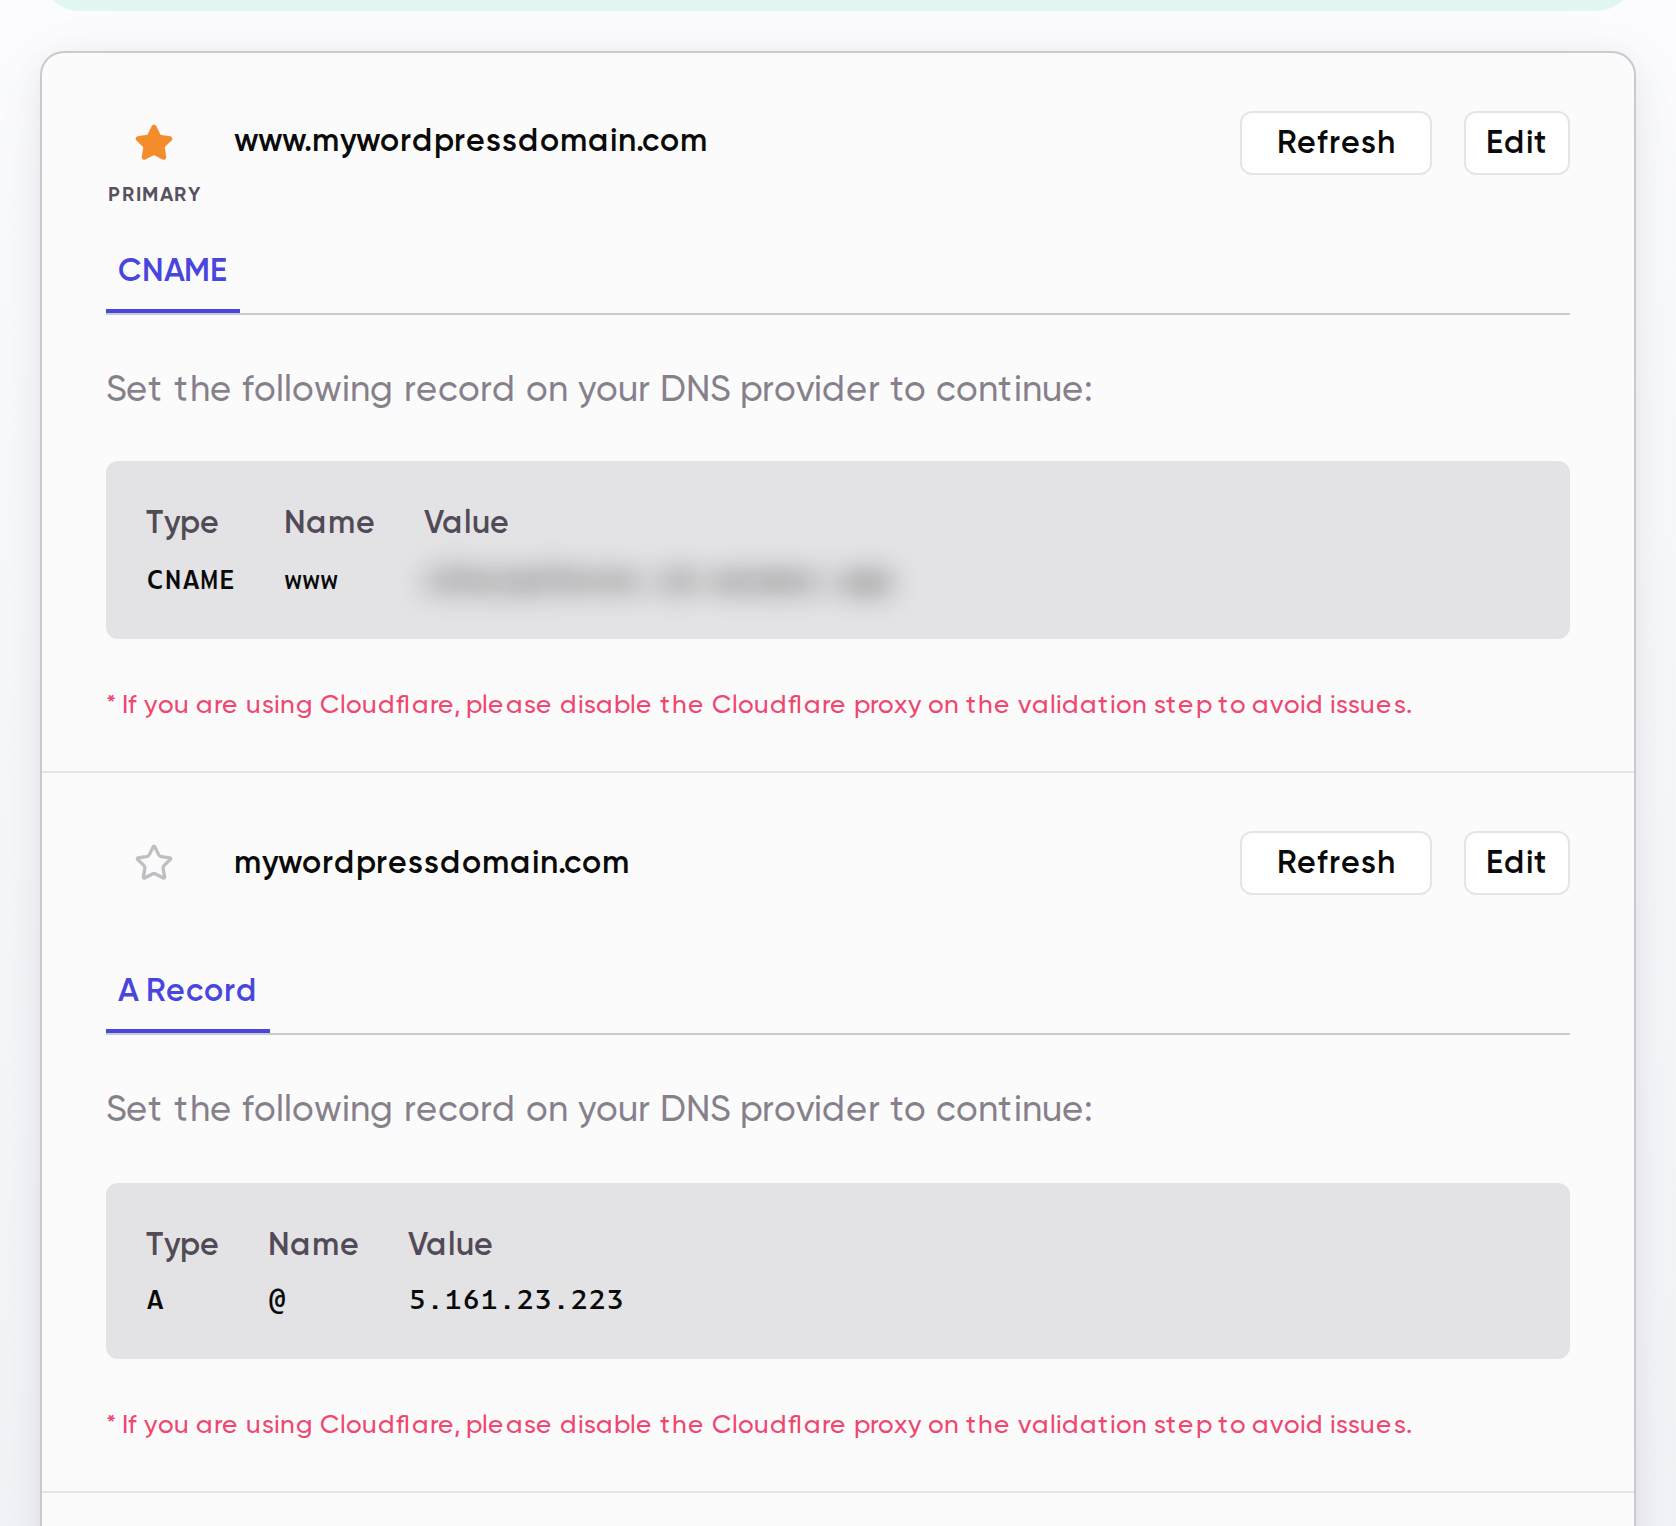
In the common setup shown above:
- The root domain uses an
Arecord - The
wwwdomain uses aCNAMErecord
If you use Cloudflare, disable the Cloudflare proxy during validation to avoid verification issues.
For the generic Edge custom domain flow, see Using custom domains with Wasmer Edge.